2. Quick start
2.1. Starting Raspberry Pi
How to power the control toolkit?
The recommended way to power the Raspberry Pi 4 and the Translator Board is via the 2-pin connector J4 located in the Translator Board.
Through this connector, a voltage between 5-42 V can be supplied. The recommended supply for the Kit is 10 V with a current limited to 1 A.

Fig. 2.1 J4 Port (10 V @ 1A)
In case you are using a VLDB+ (10V) or any other hardware, it is highly recommended to power both Control Toolkit and device to control with the same power supply and interconnecting both grounds.
Warning
The use of the USB-C port to power the Control Toolkit is no longer recommended as the device which the Kit is controlling at the end of the ribbon cable may not use the same ground source.
2.2. Connecting PiGBT
Gunicorn is a Python Web Server Gateway Interface (WSGI) HTTP server. The server hosts the PiGBT Web page that connects to the Python program which in turn is getting data from the LpGBT registers. To access PiGBT you have to connect your device to one of the three different PiGBT networks, open a web browser, and enter the PiGBT URL: http://network_ip_address:8080.
2.2.1. Connect to PiGBT Wi-Fi
By default, the PiGBT Wi-Fi is enabled. After powering-up the Raspberry Pi, You should see a “PIGBT_XXXX” network in the list of accessible networks. Once the network is visible, all you have to do is connect to it. The network SSID and the default password are displayed on the LCD.
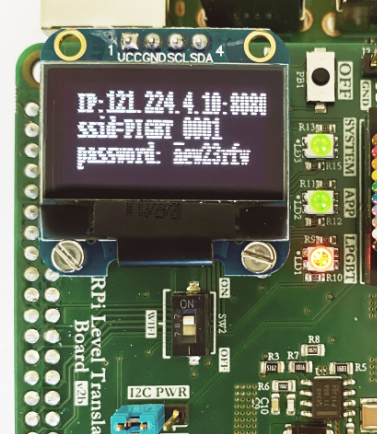
Fig. 2.2 Wi-Fi network information display
Note
You can change the network SSID and regenerate a new password. Keep the OFF button on the translator board pressed for 5 seconds.
- Set the Wi-Fi switch to ON on the translator board.
- Connect the provided ribbon cable between the translator board and the VLDB+.
- Check the WiFi SSID, the IP address and the password displayed on the LCD screen
- Connect to the Raspberry Pi WiFi network with a device.
- Open a browser and enter your PiGBT url: http://121.224.4.10:8080 (example ip taken from the image)
Warning
To activate this mode, the DHCP master mode has to be disabled. Switch off the raspberry pi and set the DHCP master mode switch to disable. Wait for it to boot.
2.2.2. Connect to PiGBT Wired network
Slave DHCP mode (Default mode)
In this mode, the first thing to do is to plug your raspberry pi to your internet router using a RJ45 cable in order to connect to the network and obtain an IP address. PiGBT and its resources can be accessed from any device connected to the same network. The IP address given to the Raspberry Pi is displayed on the LCD.
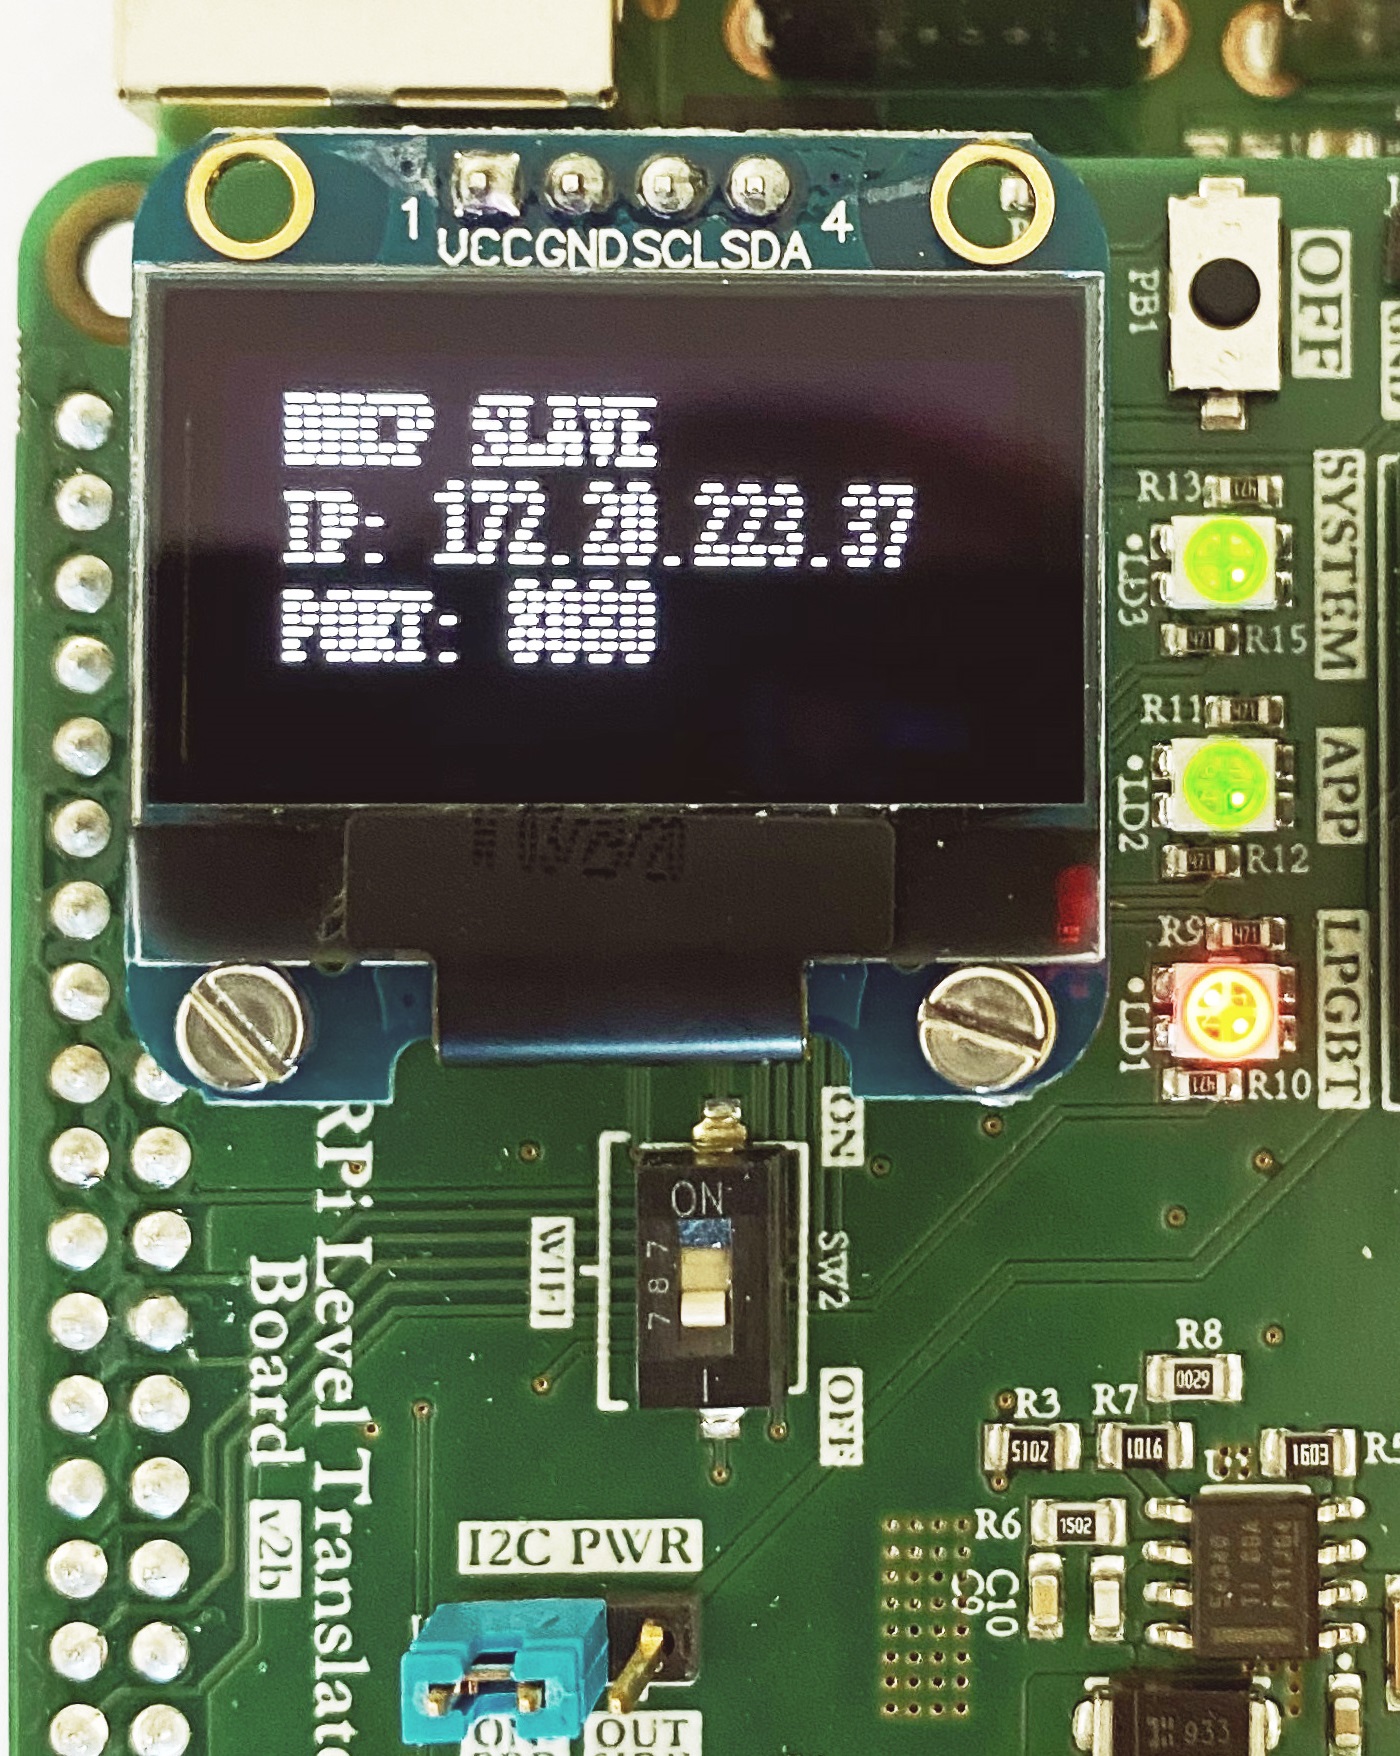
Fig. 2.3 Ethernet information display
- Set the Master Mode switch to OFF on the translator board.
- Connect the provided ribbon cable between the translator board and the VLDB+.
- Read the raspberry pi Ethernet IP displayed on the LCD
- Connect your device to the same network
- Read the raspberry pi Ethernet IP address displayed on the LCD.
- Open a browser and enter your PiGBT url: http://ip_address:8080.
Then, the Raspberry password must be changed to avoid security vulnerabilities. Connect to the Raspberry through ssh and do:
sudo passwd pi
Then change the password.
Note
If you received your Control Toolkit after the 10/2024, a custom Raspberry Pi password was set and provided.
Master DHCP mode
In this mode, Raspberry will distribute new IP addresses (DHCP server in Raspberry Pi).
Warning
To activate this mode, the PiGBT Wi-Fi mode has to be disabled.
- Switch off the raspberry pi.
- Set the Wi-Fi switch to OFF on the translator board.
- Set the Master Mode switch to ON on the translator board.
- Connect the provided ribbon cable between the translator board and the VLDB+.
- Connect RJ45 cable between your computer and the Raspberry Pi Ethernet port.
- Read the raspberry pi Ethernet IP address displayed on the LCD.
- Open a browser and enter your PiGBT url: http://ip_address:8080.
2.2.3. Raspberry Pi standalone setup
Raspberry Pi is a single board compter. In this mode connect a screen and mouse to the Raspberry Pi and use it as a standalone system.
- Connect your mouse and keyboard to the USB ports at the bottom of the Raspberry Pi USB connectors.
- Plug a micro HDMI cable this the micro HDMI port next to the USB-C connector (labeled HDMI0 on the PCB).
- Connect ribbon cable between the translator board and the VLDB+.
- Power up the Raspberry Pi and wait for it to boot.
- On the Raspberry Pi Raspbian OS interface open a Browser: menu/internet/chromium web browser.
- Open a browser and enter the PiGBT url: http://ip_address:8080